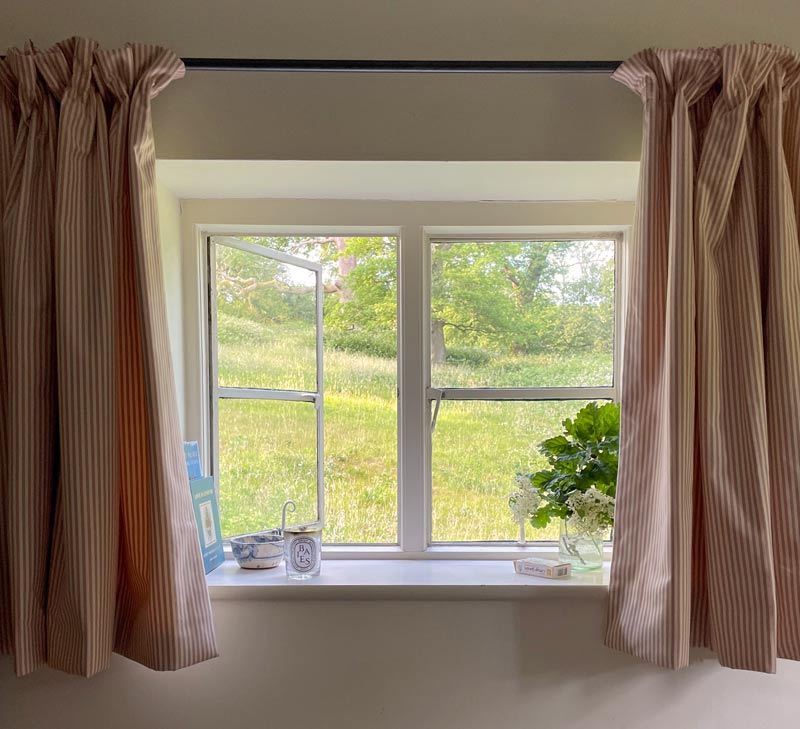
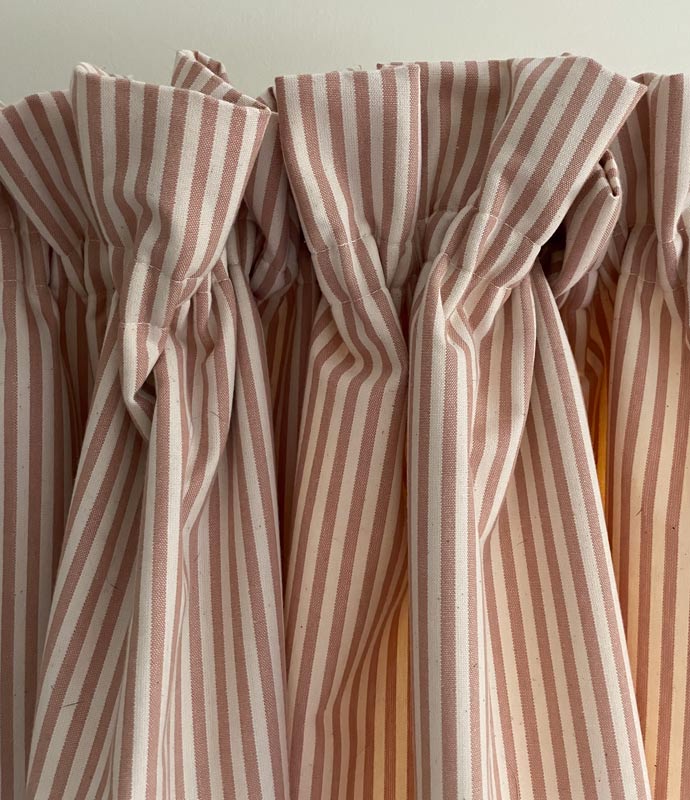
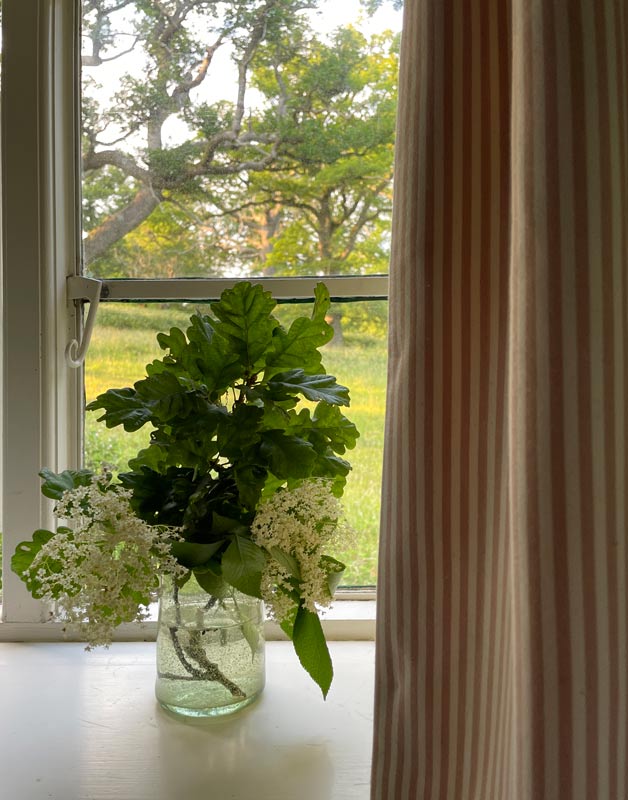
On discovering the windows in my cottage bedroom are without curtains, Phoebe suggested we make a pair of sill length curtains with a simple pencil pleat heading. I chose our Alpha Stripe in Mallow, having lusted after the chair we had in the shop last year which had been reupholstered in Alpha Stripe in Black with its pretty ruffled skirt.
We opted not to do this exercise in our curtain making workroom as we wanted to replicate a more realistic domestic set up with a standard sized table (1.4m x 1.5m) using a domestic iron and sewing machine. Because these curtains are not very big and in a fairly lightweight fabric, we amended some of the trickier techniques that our workroom would deploy when making our Tinsmiths’ Made to Measure soft furnishings. We documented the making up process in the hope that it would show curtain making at home as a less daunting prospect.
Here is how we made a pair of pencil pleat curtains in one day;
1. Measuring up and preparing your fabric
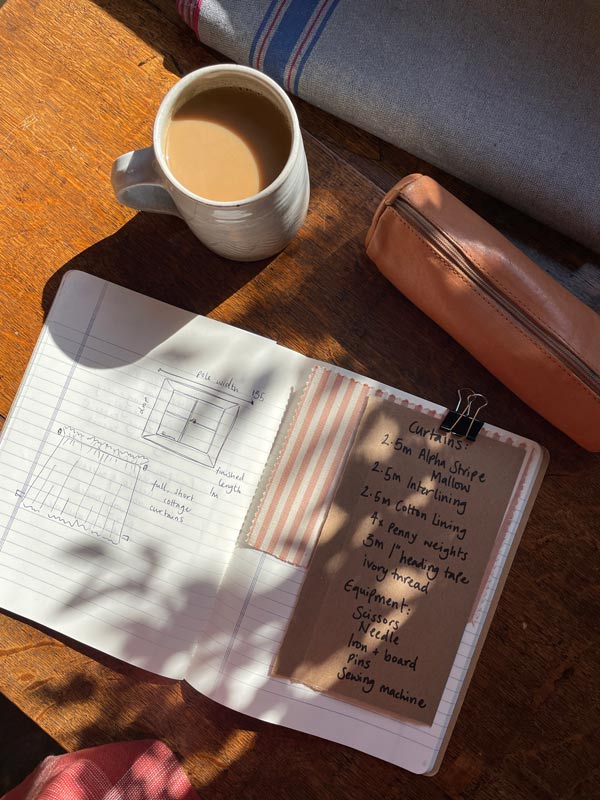
Once you have chosen a face fabric – the key to choosing fabric is getting samples! – and measured up, you need to work out the amount of fabric you will need. All worked out, it is time to prepare your fabric.
We used Alpha Stripe in Mallow, which is 100% Cotton and lovely to work with, and both a Cotton Interlining and Lining.
2. Equipment
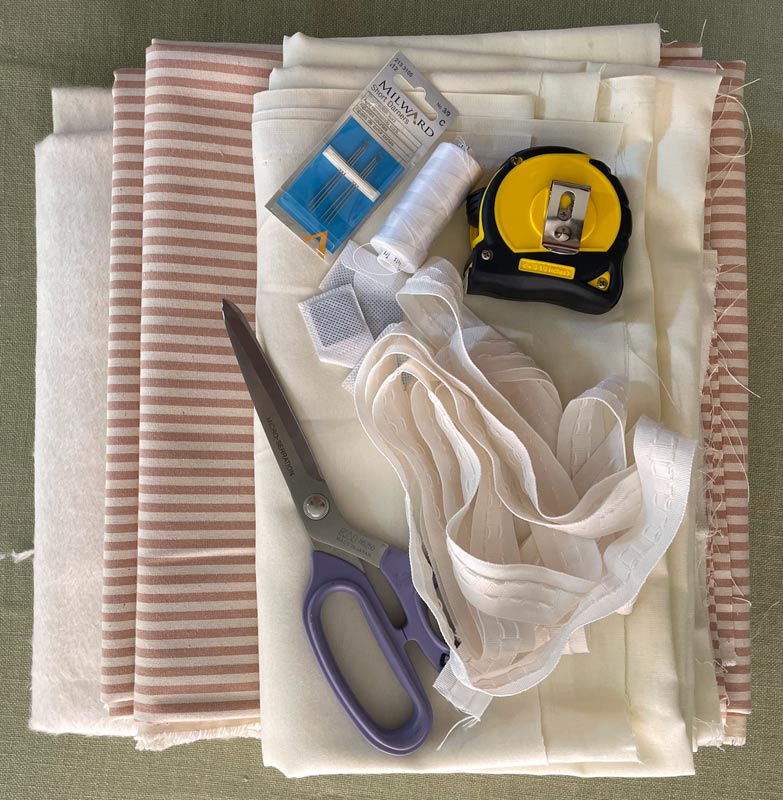
You will need:
- Face Fabric (worked out length) – it is a good idea to cut the fabric and linings into two pieces before you start!
- Interlining (worked out length)
- Cotton Lining (worked out length)
- 4x Penny weights
- Heading Tape (we used a 1″ tape for these curtains as they are so short)
- Thread (we used Ivory, choose a suitable colour that you wont notice on the front stitches)
- Scissors
- Needles
- Iron & Ironing Board
- Pins
- Sewing Machine
- Tape Measure
- Washable Fabric Pen or Biro
- Straight Edge or Ruler
Before you start, make two small bags that will hold the tape strings out of an offcut of lining, see images below. Search online for a how-to!
Ideally, you will want to use a large surface to work on, perhaps a large dining table or a board on trestles that you can walk all the way around. We used the old cutting table in our fabric showroom, which we covered in a large piece of Linen doubled over to protect the table’s surface.
We would advise having your iron and ironing board are separate from your work space, so that you don’t have trailing wires around your table. Making curtains involves a lot of use of the iron and this must be done with great care in the home, particularly if there are small children around. Likewise, keep scissors, needles and pins out of reach of tiny hands.
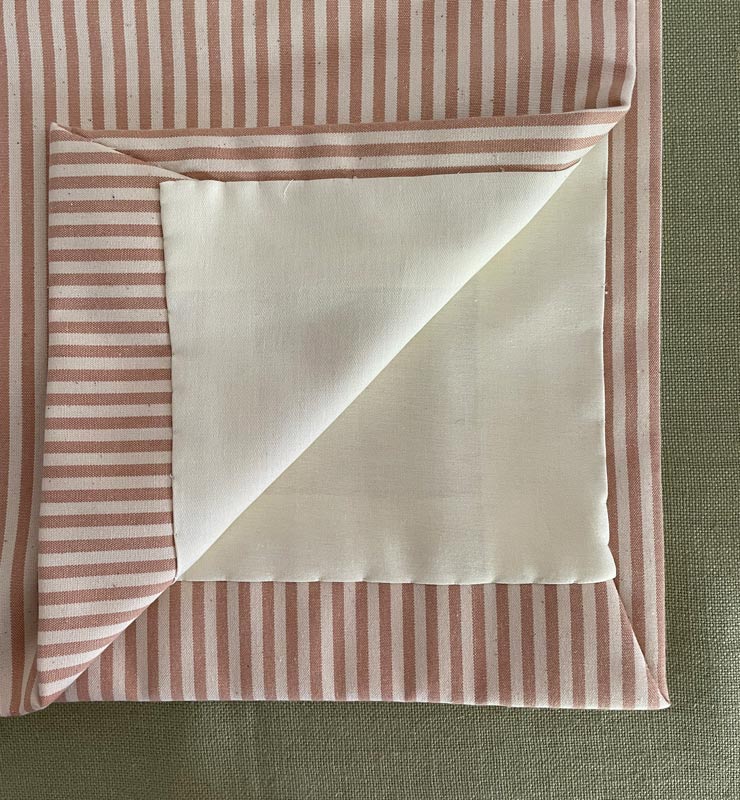
3. Face fabric and Interlining
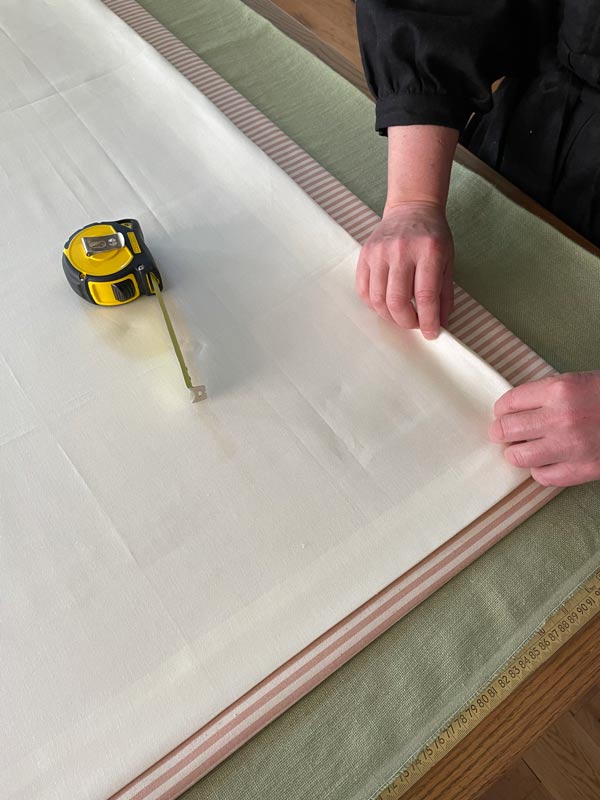
As these are only tiny curtains, we made approximately 5cm side margins and followed the line of the stripe to keep it straight then pressed with the iron to hold in place. If you are using a plain fabric, be more meticulous and make sure the edge is straight by measuring the fold at intervals along the line.
Make small snips in the selvedge of the face fabric every 15cm down to release any tension that may have been woven into the selvedge, as this can pull over time and affect the drape of your curtains.
Create the bottom margin in the same way, measuring along at intervals to make sure it is straight. Again, as these are short curtains, we cut out half of the interlining in the bottom hems to remove some bulk but if these were full length curtains you would leave the interlining to create more weight to help the drape.
Form false mitres on the corners, making sure the corners are at right angles to your side margins, and press in place with the iron.
Place 1 penny weight in each bottom corner.
Make a note of the depth of your bottom margin as it will need to be exactly the same on the second curtain.
For the following Zig Zag Stitch, start on the left and work your way around the table, changing stitch to a Slip Stitch at the corners to hold the false mitres down.
When you get to the penny weight, do two or three small zig zag stitches to attach it to the interlining and bottom margin.
4. Add Lining
Place a piece of lining over the top and press with iron. Again, snip down the selvedge of the lining to release any tension.
Because these curtains are short, we are using a fixed hem on the lining. For longer curtains, it is a good idea to have a loose hem at the bottom.
Create the side hems by folding the lining in to cover the zig zag stitches you have just done and press the folds down.
Measure and mark where your tape is going to lie, we set our tape down 6cm from the top of the curtain as we wanted to create a pretty ruffle with the gathers. Do not stitch over this mark or you will end up cutting through your stitches when you trim the top down later.
Stitch the side and bottom hems using the following stitch, starting on the right hand side and working your way round to the left, again being sure to end your stitches at the tape mark so you don’t end up cutting through your stitching.
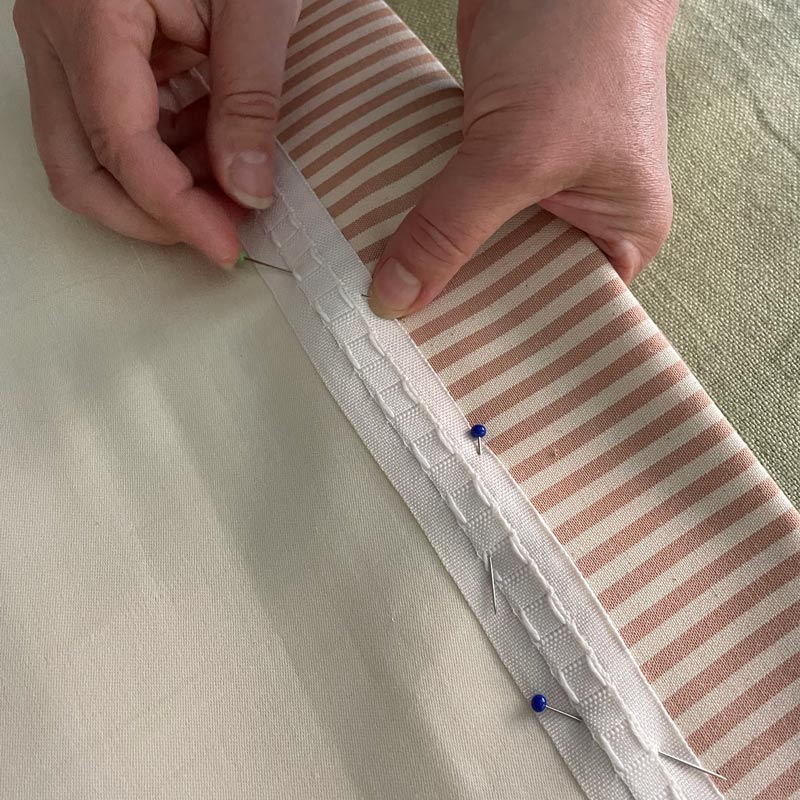
5. Applying the Heading Tape
To make the top hem, measure and mark where you want your tape to lie. We set our tape down 6cm from the top of the curtain to create a pretty ruffle above the heading, so we measured from the bottom of the curtain and marked the finished length.
Measure and mark the finished length at intervals. Use a straight rule to make a line of best fit through the finished length marks across the width and then trim down just the interlining and lining to the finished length line (DON’T cut the face fabric!)
Fold over the face fabric using the interlining and lining edge as the guide and press down this fold.
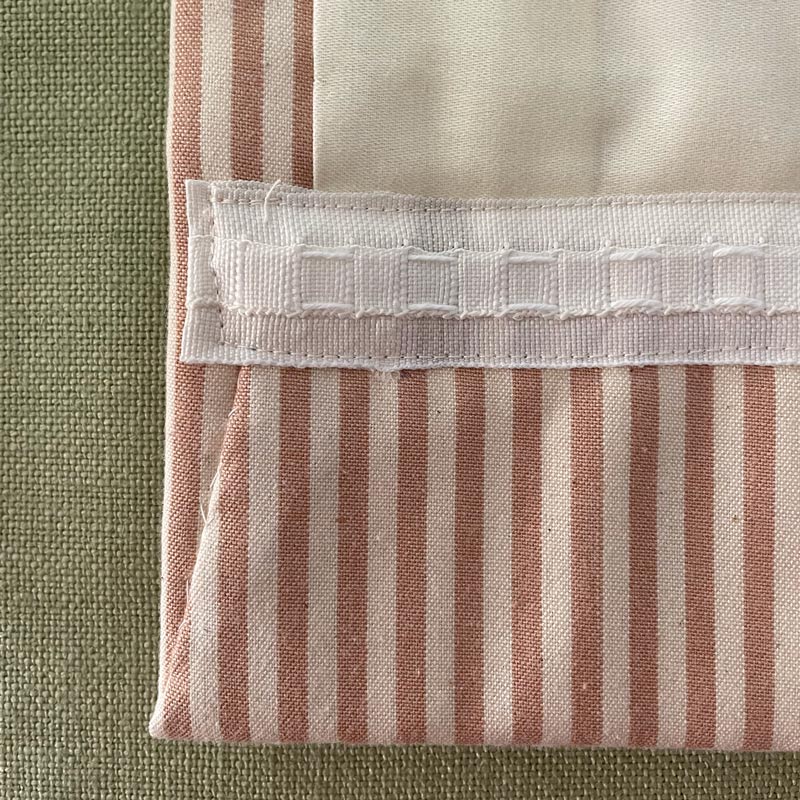
To work out the exact position of the heading tape, measure from the top marking 6cm and 8cm from the top with small dots across the width. Use the straight edge to draw a line linking the 8cm marks and cut along this line. The 1″ heading tape is the applied with the top touching the 6cm marks.
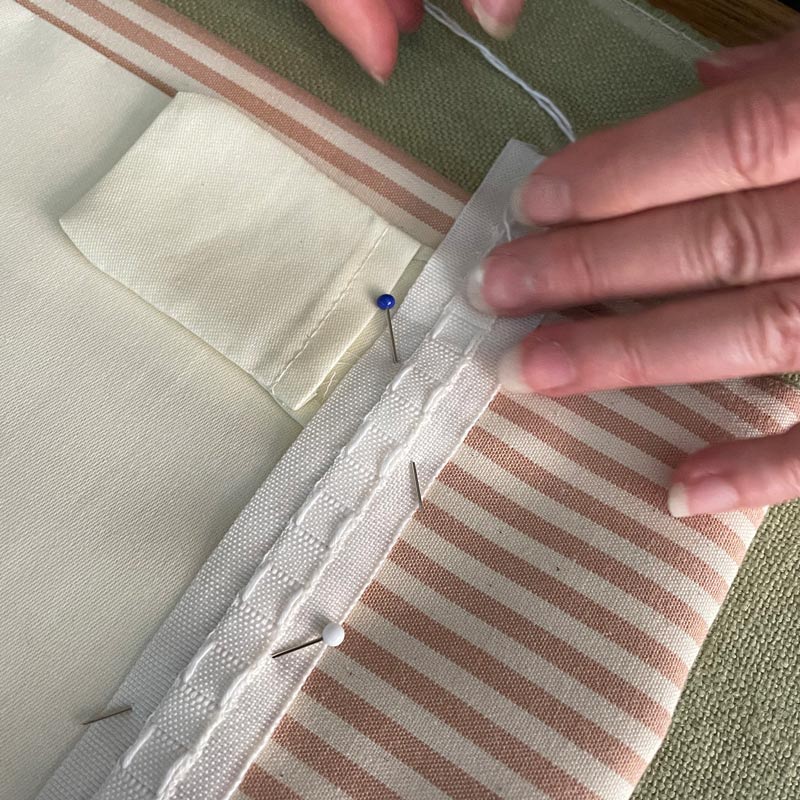
Take the heading tape and pull the strings through the back an inch or so in and tie these in a tight knot to anchor the strings. Tuck the tape back an inch or so and pin along your 6cm marks. The end with the knot in the heading tape will be the leading edge for this curtain.
Pin tape in place along the marks, making sure it is straight. At the other end, tuck one of the pre-made bags under the heading tape. On this side, pull the strings in the heading tape out so that you can clearly see them. These are what you will pull to gather up when you are hanging the curtain.
Fold up this curtain and move to one side. Move onto the second curtain
6. Second Curtain
For the second curtain, repeat all of the above steps.
When you get to the top hem and tape, remember this is a pair of curtains so it has to be opposite. the anchored end of the heading tape must be on the other side to the first curtain so that the leading edges meet each other at the middle of the pole.
Once you have your tape pinned in place, get your sewing machine prepared.
Sewing Machine Tips
1. Change your needle – start with a new needle that is not too fine. You can buy soft furnishing needles from local haberdasheries or online. 2. Test your machine on a couple of layers of scrap lining before you start on the curtains to make sure it is all running smoothly!
Sew the tapes in place using a simple straight stitch on the sewing machine.

7. Drawing up Tape
Lay your curtain out flat on the table, lining side up.
Measure your pole width again and divide by 2, plus 5cm.
Eg. Pole width = 150cm, divided by 2 = 75cm, plus 5cm = 80cm
This is the measurement you want each curtain to be once it has been gathered.
Set your tape measure up to the measurement and work next to it.
Hold the anchored edge of the tape in one hand and the two strings in the other and pull the strings. Distribute the gathers evenly along the strings.
Check that it matches your measurement and tie a slip knot in the strings at the end. This needs to be a slip knot that will stay in place but also undo when you pull it should you ever need to take these curtains down and reset them.
8. Fitting your curtains
Place curtain hooks along the tape every 10cm or so (we used about 8 hooks on each curtain)
Rings already on the pole, hang the hooks onto the curtain rings. Have one curtain ring the other side of the pole bracket to hold the curtains at one end when drawn.
Follow our more in depth instructions here.
And that is it!
DISCLAIMER –
This exercise took roughly 3.5 hours with two people working, it is a possible task for one but working with a chum is much more enjoyable!
This is a documentation of how we made one pair of small, interlined curtains in one morning and is not a definitive guide to curtain making. For more detailed information and how-to’s there are lots of books out there, including The Encyclopaedia of Curtains by Merrick & Day which remains a bible at Tinsmiths today.

Hello,
Your cottage pleated curtains are lovely. I’m working on making my own. I just have quick question.
What fabric is the 1″ header tape? Is it cotton?
Thank you,
Roxanna M
Hello Roxanna,
Here is a link to the heading tape we used in the film https://www.tinsmiths.co.uk/product/1-inch-curtain-heading-tape/
It is made from a mixed fibre composition.
Good luck with your curtain making.
What interfacing/interlining did you use in these curtains?
Hello Jeni, thank you for your enquiry.
There are direct links to the interlining and lining used in the article, under point 2. Equipment.